How (not to) Remove an Old Through-The-Wall Air conditioner.
or
Or How I Could’ve Asbestossed The Family
-
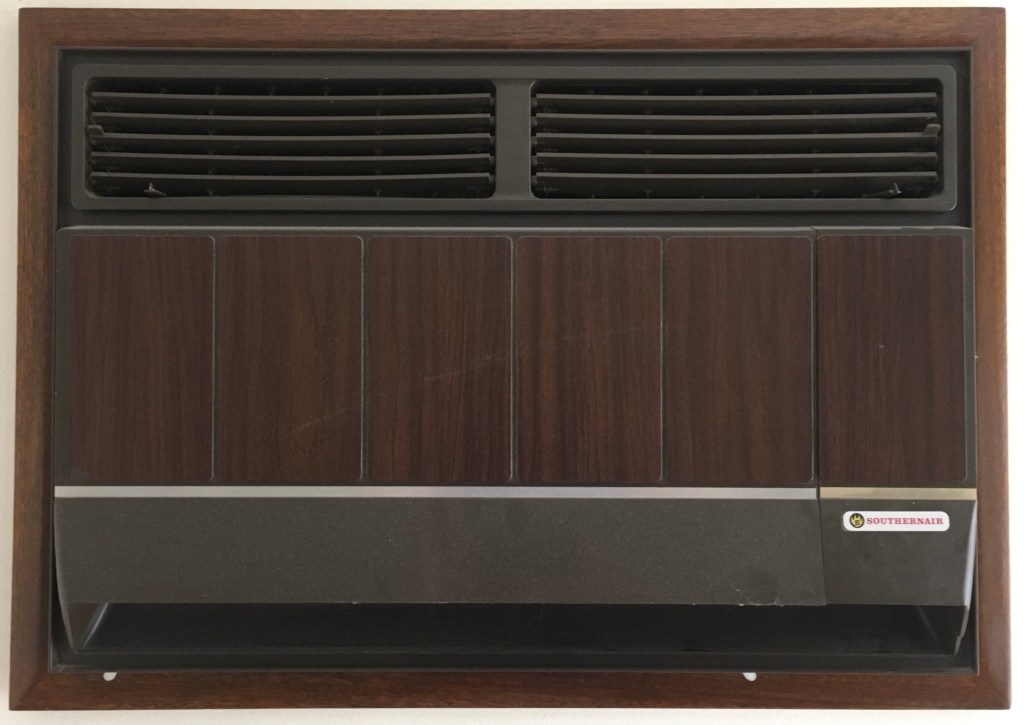
So. There we were. Summer 2021/2022, damn hot and with no means of cooling the house except for this ugly old 80s through-the-wall, faux wood panelled aircon unit that would probably only cool one room and likely be ridiculously expensive to run.
To be honest, I’m not sure how well it worked – we unplugged it when we moved in because it looked like a dusty bacteria trap and it was also plugged into a standard indoor powerpoint that had been mounted outside in the elements and felt like a house fire waiting to happen.
Conversely, when we moved in, in chilly July 2021, the only heating we had was a gas space heater which, while providing quite a “nice” heat (if you know what I mean?) and heating the living room quite well, would soon bankrupt us if we relied upon it to heat the whole house. The plan from the start was to remedy this situation by installing 3 reverse cycle air conditioners (RCAC), a big one in the lounge/kitchen area and small ones in ours and the baby’s room. While it seems here in Australia most people use them exclusively for cooling, they’re really good at heating too. RCACs are not super expensive to install but are super efficient and cheap to run. They have what is called a coefficient of performance (COP) of around 4, or they could be described as 400% efficient (makes me sound smart hey? Unfortunately I’m just parroting this from people who know their shit). Pretty sure this means that for every 1 Kw of energy they use they provide 4 Kws of heat, whereas, say one of those electric oil or fan heaters provide 1 kw of heat for every kw of energy they use. Not sure about the COP for the cooling side of things, or for the gas heating so for comparisons sake, I’ll do some research and get back to you…
{So, it turns out cooling is measured in EER or Energy Efficiency Ratio but it’s basically the same deal – an EER of 5 means that for every 1kw of energy that unit will produce 5kw of cooling.
It seems gas heaters use a star rating system where the amount of stars equates to a thermal efficiency rating and I can’t be bothered going into it so, do some googling if you must know…}
Anyways, we figured that the 3 x RCAC should make us comfortable and not break the bank. As a side note, don’t wait until summer to organise aircon. Everyone is busy and stock can be hard to get hold of.
Melbourne (well Geelong nowadays) is neither the hottest nor the coldest place out there but it can be pretty fuckin’ uncomfortable in summer when you get a run of 40c plus days, especially in a shitty old brick veneer house (picture a brick pizza oven), and can be pretty damn chilly in winter. Eventually we’ll get solar panels to subsidise some of the running costs but that’s another story (one that sent me spiralling down a rabbit hole of millions of panel/inverter/installer reviews and getting quote after quote just incase the next one was better only to finally give in to analysis paralysis and decide it’s all to hard and that doing nothing about it was the way forward) and I digress. So, on to removing an ugly old aircon unit!

First stop as per usual was YouTube. As we all know YT is a fantastic resource, literally any job you need to do, someone has put out a video of how. Wading through the shit can take some time but it’s well worth it I think (the one job I’ve done freestyle without YT help so far turned into a bit of a fuckin’ catastrophe to be honest but I’ll cover that in a later post).
From the videos, the first thing that became apparent was that these units are pretty heavy. Most of the videos featured smallish ones and ours was pretty damn big. All the videos recommended getting someone to help you, and in hindsight so do I. However, I had no one around to help me and couldn’t be bothered trying to find someone so I pushed on. It ended up ok but things easily could have gone pear shaped so please be more sensible than me and get someone to help.

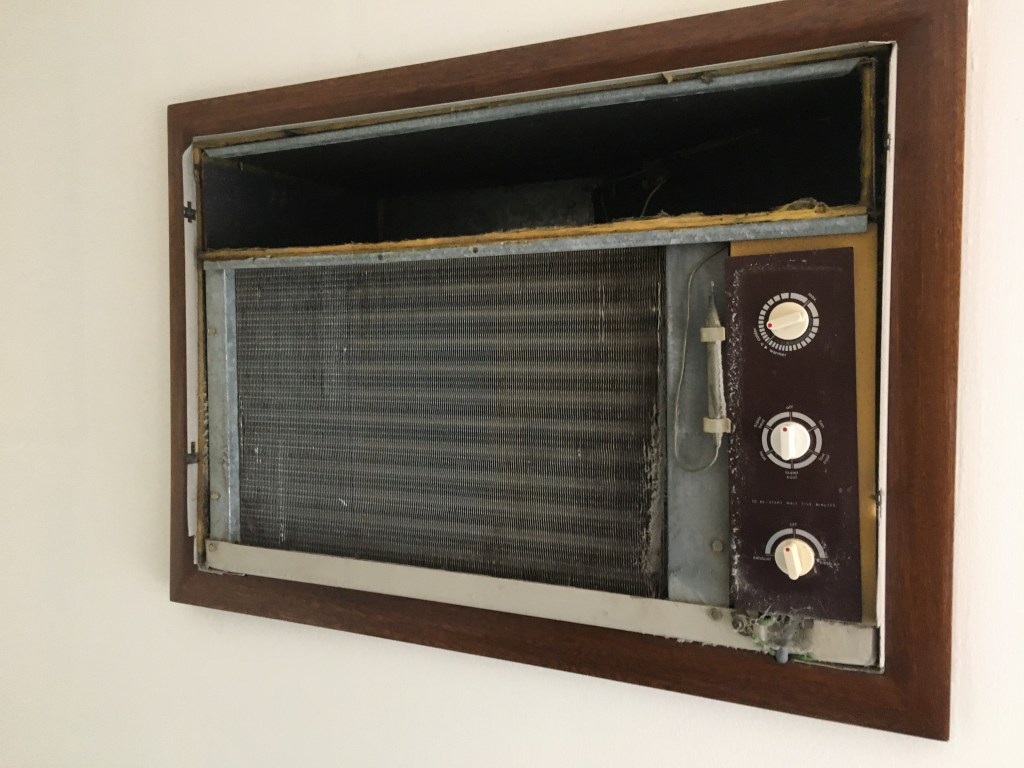
Basically the interior section, or the ‘guts’ of these old aircon units slide, from inside the room, into a metal ‘sleeve’ section that has been installed from the outside of the house, screwed into the studs/noggins and bolted onto the outside wall. Then a fancy faux wood veneer control panel goes on the front and bob’s your uncle. So, I first removed said faux wood panel (revealing some weird soldering iron/pen looking thing),

and then after I took out all the screws I could find, I found that basically, the only way to get it out was with brute force. In all the videos I watched they all slid out pretty easily. That wasn’t the case with mine and I wondered if after making a decent mess of the wall, I was doing something wrong or I’d fucked up somehow and was going to have to abort the mission resort to calling a pro. I persisted however and essentially just yanked on it until it started to slide out and I pulled it far enough that it hopefully still stayed in the wall and didn’t fall on me until I could work out a way to get it down semi-safely.

This turned out to be using a ladder. Now I do a lot of dumb shit and have many times gone through with something and THEN thought about better ways to do it (stay tuned for a classic example!) but I was quite proud of this plan. Given I’m reasonably broken: dodgy back, dodgy wrist, golfer’s elbow, crappy left shoulder etc etc… there was no way I was going to be able to lift it down. One of the better videos I watched showed a bloke with lots of tools and timber and time (none of which I had much of) building a timber-frame ramp under the unit so he and his wife could slide it down safely after they got it out. I could’ve potentially jerry-rigged up a much shittier version out of decaying old timber scraps from the backyard but just as likely it would’ve collapsed and squished my toes or some shit. So what I decided on was using my adjustable ladder* (which I highly recommend buying if you need a ladder, mine was under $400 from memory and worth every cent).
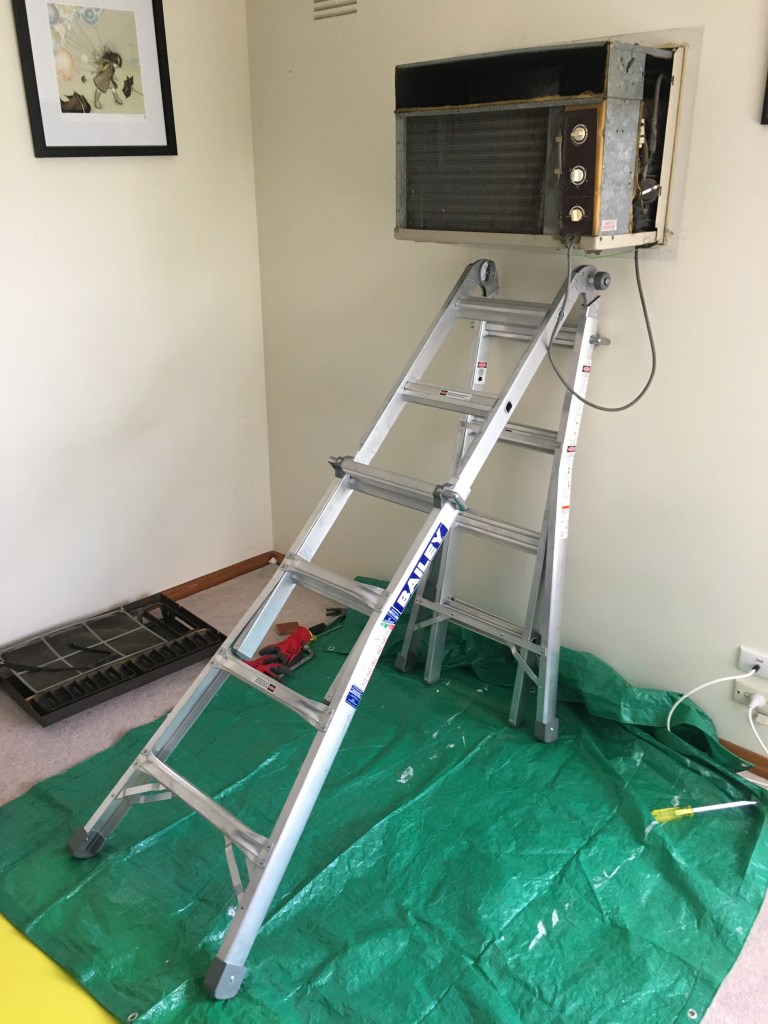
*It’s worth noting that this is not the ladders intended purpose and you’re loading it up in ways it’s not designed for and it may be dangerous and the manufacturer may not honour any warranties and it may all go wrong and just because I did it doesn’t mean you should etc etc etc
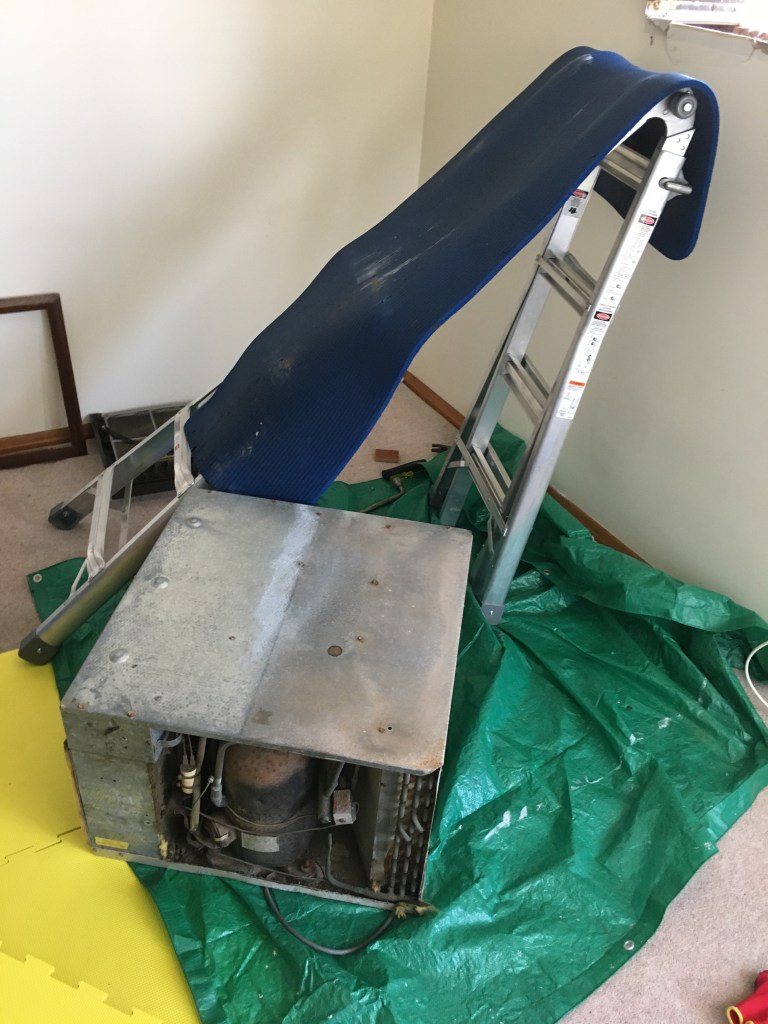
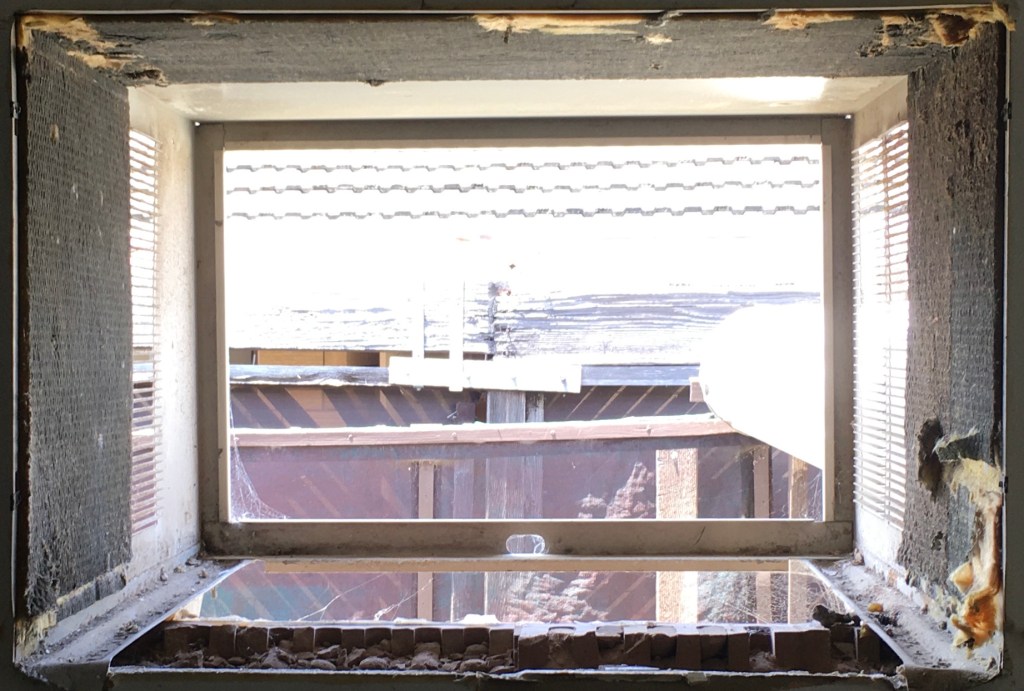
I extended one side to make a sort of right-angle triangle and jammed it under the unit as close to the wall as possible (not sure why I’m describing this given you can just look at the photo?). I didn’t really want to gouge big chunks out of the ladder so I got a crappy old exercise mat out of the car and laid it on the rungs. At this stage I was barefoot and for once I wisely listened to my inner voice and went and put on some steel toed boots just in case 50+kgs of vintage crap slid off the as yet unproven ladder rig and, as previously mentioned, squished my toes.
Basically I just tried to wiggle and pull the thing out really gradually until it was free of the wall and then guide it down the ladder. This pretty much worked, it dropped out with a bit of a thud, tearing the plaster a bit as it did, and it was almost unmanageably heavy but I was able to slide it down without damaging myself or the ladder or the floorboards which I was soon to free from 30+ years of captivity beneath ugly carpet.
The old folks we bought this place from have been here since 1988 (paid it off in ’91 if you can believe that shit… “but interest rates were 17% back then!” yeah, and a house cost less than 20 grand Boomer) and I’m assuming they had the aircon unit installed but it may have been there prior. Either way its fuckin’ old and I assumed full of dust and critters so I had laid an old tarp on the floor under my ladder rig so I could minimise the dust I had to clean up. The assumption was accurate, it was full of dust and there was a decent sized black house spider in there (forgot to take a picture, sorry) but it landed nicely on the tarp and there it stayed.
As a side note, if you’re undertaking this job, close all the other doors and windows in the house or at least in the room you’re working in. It was a sunny day so I had the house open but it was pretty breezy and once the aircon was out, the draft coming through the newly created hole blew dust and shit straight into the living room. While it turns out that this was a minor inconvenience, given my soon to be revealed mistake (read royal fuckup) it could’ve proved to be a major problem.

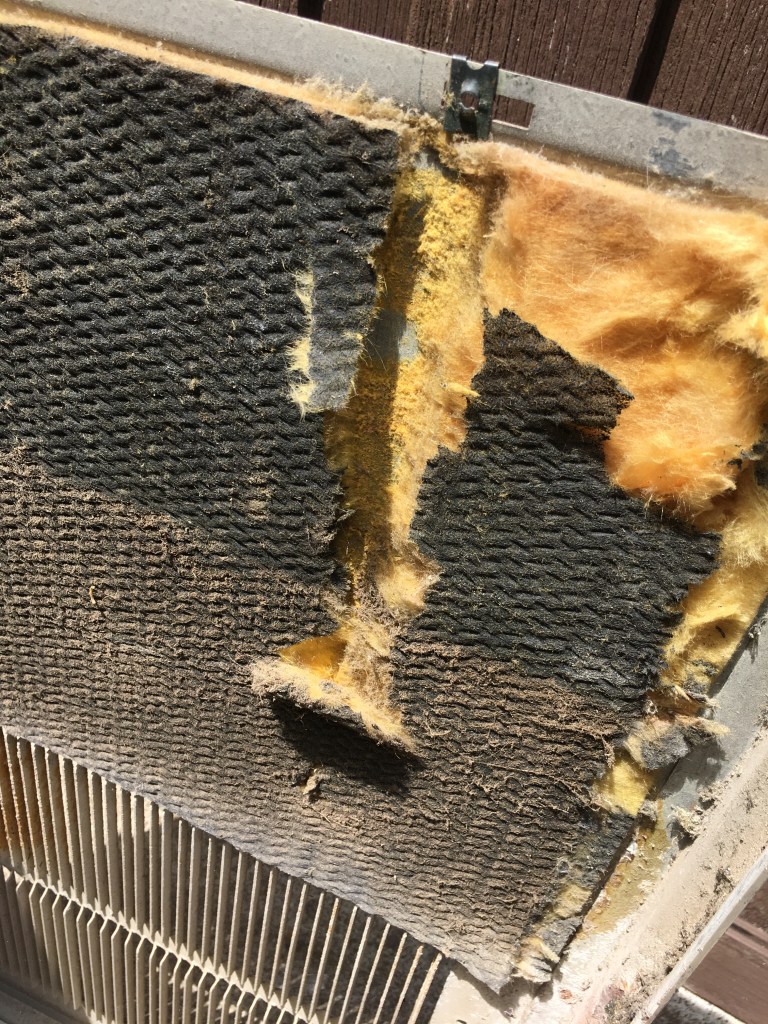
So beyond dust and a lonesome spider, I also discovered that all the surfaces of the interior of the metal sleeve that the unit sat in was insulated with a yellow fibrous material with a black outer layer, and in the removal of the unit, it had been ripped and fibres had been dislodged and dispersed into the atmosphere (trying to sound smart again). At this stage, as the breeze blew through the hole in the wall into the lounge room I thought little about it. “ah yeah, fibreglass insulation no worries” or something along those lines.
It wasn’t until I was trying to unscrew the outer sleeve from the studs so I could yank it out that I thought more about it. The screws were tough to get out. Lets be honest, they were flat-head screws and it was a fucking nightmare. I was using an impact driver at this stage and I had to use so much force to keep the bit in the slot that when it inevitably slipped out – and it did, repeatedly – it punched straight into the insulation while spinning, thus further tearing the fibres. It was then, as I watched motes of tiny yellow insulation fibres drift lazily into the room, nicely backlit through the hole in the wall by the morning sun that I first thought “hmmm, this shit is about the right vintage to be made of asbestos”. But here’s the kicker folks, that was immediately followed by “ah well, should be right” and I continued on.
For some stupid and unexplained reason (given I’m a pretty paranoid person and a massive over-thinker), I have this blasé inbuilt “should be right”/“not gonna think about it too much right now” reaction to things until it’s too late and then I go into scramble mode trying to redo/fix/undo/research the effects of/panic about whatever fucking stupid and easily preventable mistake I just made, the one that just a second ago according to me “should’ve been right”. Over the course of my life this has caused much anguish and extra work and made things so much harder because I have to then go back and remedy the situation I just caused. “I’ll learn from it this time though for sure, won’t do it again believe you me”. Yeah right… Anyway, enough about my psychological issues and on with the story.
So, what should I have done? What would I have advised anyone else to do had they told me they had just found 30+ year old and potentially asbestos containing insulation and disturbed it? Firstly, and pretty fucking obviously, STOP!
Asbestos is nasty shit. And problematically, it’s absolutely everywhere. It was used heavily in commercial building products from the 1940s to the late 80s when blue and brown asbestos containing products were banned, and according to The Cancer Council, until the final ban on use and importation of all asbestos containing products in 2003, Australia was one of the biggest users per capita. One in three Australian houses has asbestos lurking somewhere. So unless your house was built post 1990 there’s a chance it can be found in (and this is in no way an exhaustive list so do your own research):
- The eaves of your roof (like at our place),
- Vinyl/lino floor tiles and or the glue that holds them down (also I think at our place, have to get it tested).
- External fibre cement cladding and some of those fake weatherboards
- That horrible fake brick cladding
- Corrugated cement roofing
- Internal boards in wet areas of the house – bathrooms/laundries
- Some of that horrible “popcorn” textured paint.
- Lagging around hot water pipes
- Flue pipes themselves
- ‘Blow-in’ loose fill roof insulation
- Insulation in old domestic heaters
- Even carpet underlay in some unlucky houses…
Asbestos exposure can lead to some pretty horrible diseases like mesothelioma, which is a cancer with no cure, that’s pretty much only caused by asbestos. Each year 700-800 people in Australia are diagnosed with it and generally the time from diagnosis until death is 11 months which is pretty scary. Asbestosis is another disease which is basically scarring on the lungs that makes it hard to breathe… While it does seem like the amount of fibres you inhale contributes to the risk of disease and smoking also increases the likelihood, around 4000 people a year die from asbestos related issues so please, just don’t risk it.
Anyways, back to my story…
Secondly, I would’ve said “go and put on a mask idiot!”. Was I wearing a mask? No. Do I have a box out in the shed with safety stuff in it, including P2 masks? Yes. Was that box easily accessible and only a 30 second walk away? Yes. And should I have… Anyway you get the point, I made a stupid fucking mistake. Asbestos aside, you don’t really want to be breathing dust if you don’t have to, even less so tiny itchy fibreglass fibres, so when you’re doing something involving dust – cutting/drilling/grinding/sanding/pulling up old carpets, whatever, do me a favour and wear a mask ok?
Thirdly, I would’ve said wet it down. Wetting asbestos containing material is a pretty well accepted mitigation technique. They use it on big building sites when they’re demolishing asbestos containing buildings and you can easily do it at home too. You only want to wet it enough to stick the fibres to the material and stop them becoming airborne. I don’t think you want to use so much water you wash them off the original material and they end up somewhere else with the potential to dry out and become airborne later on.
A technique a builder mate of mine told me was to use a 1:5 ratio of PVA glue to water in a spray bottle if you have ever disturbed asbestos. Spraying any disturbed material with this mixture ensures the fibres remain in place and then when it dries it kinda seals them in situ.
Man, even a spray bottle of plain water to mist the insulation and stop the fibres floating everywhere would’ve sufficed in my situation. And I actually have one for my indoor plants in the next room. Did I go get it? Nah, I didn’t. What did I do instead you ask? I sort of put it out of my mind, switched to a screwdriver for a bit more control and a bit less damage and I pushed on until I had it unscrewed, then I unbolted the external bracing from the wall, sliced away the external silicone seal and was able to wrench it back out of the wall while perched awkwardly atop the ladder. It was about this point that I started to freak out a bit and thought “oh fuck, what have I done”.


I covered the hole inside and out to make the place weather proof, then I moved the external sleeve bit that contained the insulation in question as far down the back yard as I could, went back and wrapped the tarp around the internal aircon unit and taped it up so no more fibres could escape into the lounge room. Then I used my old tilt trolley with two pretty flat tyres to awkwardly get it out of the house and onto the back porch and there it stayed while I obsessively searched the internet using hundreds of keyword searches that included variations of the name and numbers of this particular model of aircon, and asbestos. When that failed to give me any info as to whether the insulation was likely to contain asbestos I shifted to just researching the effects of asbestos exposure, particularly on babies.
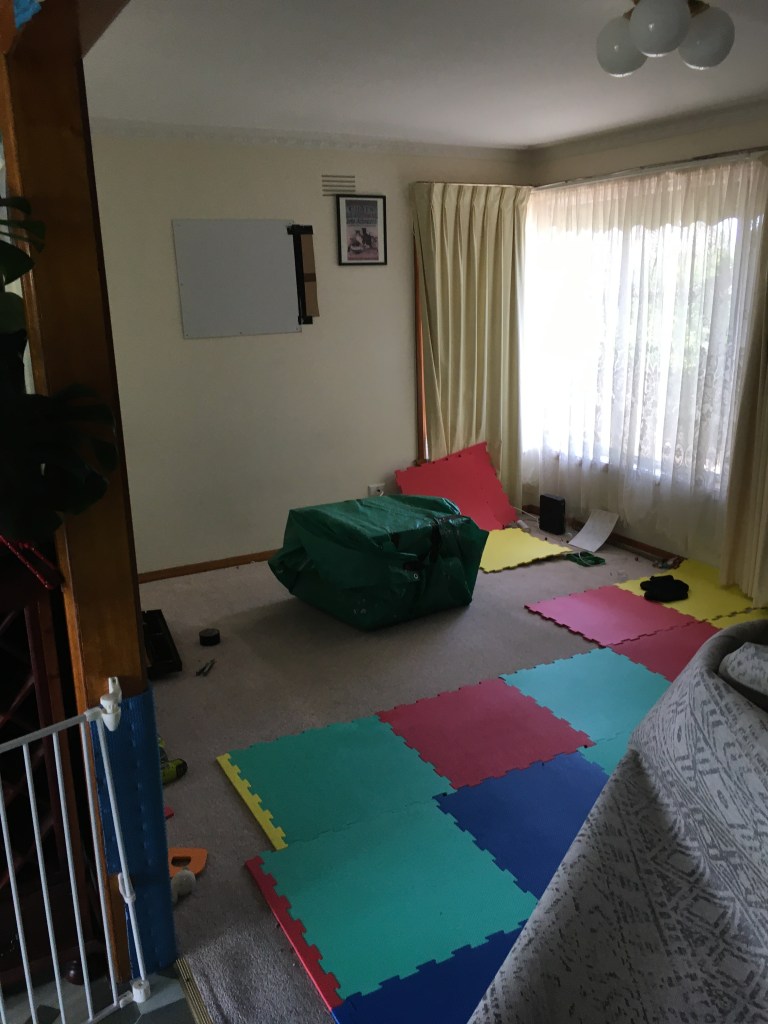
That was my main concern. The lounge room is where our baby hangs out most of the time. It’s been baby proofed and we’ve sealed it off with baby gates so he can’t escape (even though he tries his hardest). The idea that he may end up sucking down some asbestos fibres out of the carpet and that my half arsed and blasé renovation attempts may have caused him some future harm made me feel like a fucking irresponsible moron and just so, so guilty.
I vacuumed the room (floors, couches, cushions, curtains, windowsills, anywhere that could harbour the dreaded fibres) like a madman with the windows wide open all the while cognisant of the fact that the average domestic vacuum without great filtering systems, while good at sucking stuff up, is also likely good at pumping stuff back out into the atmosphere. Nonetheless it was my best option at the time given the hour where I had to go and grab the baby from childcare was rapidly approaching…
I did what I could for that day and we kept the windows open and minimised the time we spent in there while I shifted my obsessive search to asbestos remediation and started reading about HEPA filters. It turns out that asbestos fibres clock in between 0.7 to 90 microns in size and HEPA (High-Efficiency Particulate Absorbing/Arrestance) filters are capable of absorbing particles as small as 0.3 microns and and thus a decent option for trapping any of the hazardous little bastards that I may have unwittingly loosed into the room. This was good news as HEPA air purifiers are readily available these days, not super expensive. and according to this site – https://www.elementalasbestos.ca/2019/01/can-hepa-air-filters-remove-asbestos-from-the-air/ – generally have a 99.97% efficiency rate.
So on I went to obsessing over reviews and price comparisons of air purifiers. Naturally the effectiveness of the purifier will depend on how good the unit is and this is generally somewhat correlated with price (yeah yeah not always, I know) and being a bit of a tight arse I went with a model that was somewhere in the middle (around $299 on sale from $400 from memory) and was rated for a big enough space. At the time given I was in a bit of a hurry, all I took into account was the size in square metres of the room (the lounge room and kitchen are semi open plan so I just just added the two together and multiplied the width by the length) and bought a unit that was capable of handling a much bigger space. Going back now and doing a bit further research it seems that despite the size rating given, Air Exchanges per Hour or ACH are a more important thing to consider. This is the amount of times a purifier cleans the air in the room per hour. I didn’t really look into this so if you’re in the market for a purifier keep this in mind so you get the appropriate sized unit for your space.
Most manufacturers seem to only give a CADR (Clean Air Delivery Rate) rating but you can use this to work out the ACH. This is a bit of a rabbit hole with some mathematics involved so rather than fumbling my way through an explanation, here’s a link to a site that explains it all really well: https://airpurifiersdirect.com.au/pages/air-purifier-buying-guide . They also point out that these metrics do have limitations and are not the only factors you should consider so blah blah blah…
Important factors to note are time; and that you need to seal off the area you’re trying to purify. Elemental Asbestos state that the purified air is very slowly redistributed when compared to the volume of air in the room so it can take hours or days to remove all the airborne particles (hence why a high ACH is good). Also, if there’s a source of asbestos still dumping fibres into the room, you’re probably pushing shit up hill trying to purify it so please, *call a professional!!* and sort that out first. Air purifiers also seem to work best when all the doors and windows are shut. This way it can clean the air in the room without particles from other rooms coming in (or asbestos particles flowing out to other rooms). The air purifier will draw in air from outside if room doors aren’t closed, and unless you have an enormous unit and want to try to purify the whole world, it’s probably advisable to shut the windows too.
Anyways, after I got it home I ran the purifier non stop for a couple of days while I set about taking a sample of the insulation and sending it off for testing. I found a local asbestos testing lab in Geelong that are NATA accredited (which is apparently what you want) and asked them how they wanted me to submit it. They said just a 50 cent piece sized chunk was fine and to just chuck it in a labeled ziplock bag. Finally I had seen some safety sense so I put on a P2 mask and some surgical gloves and went and grabbed some of the insulation. I double sandwich bagged it and dropped it off for testing with a minimum of two business days to dwell on the stupidity of my actions.
“Well?”, you cry from the edge of your seat, “what was the outcome?!!”. It was negative. There was no asbestos present in the sample. I was just so, so relieved that I hadn’t filled the house with hazardous fibres and doomed my baby to mesothelioma in 30 years. This of course was just dumb luck and had nothing to do with good working practices but I will learn from this mistake and exercise restraint and caution from this day forth*
*may or may not learn from this mistake and exercise caution or restraint…
So, here’s the TL;DR version if you (understandably) couldn’t be bothered reading the above:
- Get your PPE (Personal Protective Equipment, though post Covid we all know what this stands for) sorted – Mask, gloves, eye protection, decent shoes that’ll save your toes if something goes wrong – and USE IT!.
- Grab a couple of screwdrivers, an impact driver, Stanley knife/box cutter, something to cover/protect your floor and minimise cleanup.
- Shut the doors and windows to the room so the breeze doesn’t blow too much old dust and crap in through the hole.
- *Get someone else to help you*. Don’t try to be a hero like I did.
- Find the screws holding the cover in place and remove them. Then pry that loose.
- Then find any screws holding the guts of the unit in place and take them out. Hopefully they’re Phillips head and not flat head…
- Then just carefully pull the thing and hopefully it easily slides out of its external sleeve.
- Your options now are to build some sort of solid and safe ramp (probably not a ladder) to slide it down, or if you and your mate are strong enough, lift it down but they can be fuckin’ heavy so probably best to ramp it.
- Then get it to the point where it’s almost free but still safely stays in the wall – it’s a bit of a balancing act – and seriously, get that second person to help you guide it onto the ramp and control it down.
- Then slice away any silicone sealing the sleeve into the plaster and remove any screws holding it into the studs/noggins
- I didn’t, but in hindsight I would’ve covered hole on the inside wall at this point. That would minimise dust/fibre ingress.
- Then head outside and slice away the silicone holding the sleeve into the bricks or weatherboards and unbolt the bracing.
- Then, given you are probably up a ladder, very carefully pull the sleeve out and pass it to your mate.
- Cover the hole in the outside wall and phase one is complete, well done!
- That’s probably enough for one day so grab yourselves a beer and chill out.
On a serious note, Asbestos is nasty shit. If you have even the slightest suspicion there is some in any of the stuff you are about to drill/cut/break/smash, go get it tested. The price of the test ($66 in this case) is money well spent if it stops you making the environment hazardous for you and your family.
Have you ever encountered asbestos? What did you do? Let me know what you think in the comments.
